
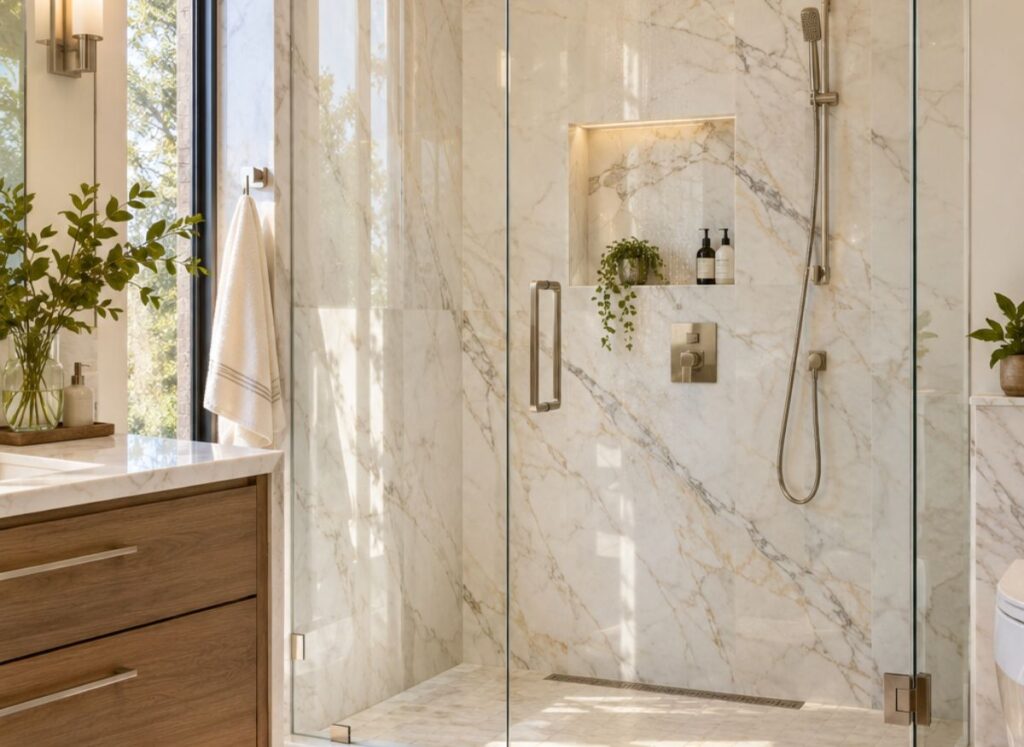
A frameless shower door changes the entire feel of a bathroom, trading bulky metal framing for clean glass edges and an open, uninterrupted sightline. That streamlined look comes with a tradeoff, though: because there’s no metal frame to hide small errors, every measurement, hinge placement, and adjustment has to be closer to exact than it would be with a framed alternative. Get the installation right, and the door swings smoothly, seals properly, and holds up for years. Get it wrong, and you’re dealing with leaks, uneven gaps, or a panel that never quite closes the way it should.
This guide walks through the full process of installing a frameless shower door, from measuring the shower opening and gathering the right hardware to hanging the glass panel and sealing the finished enclosure. Whether you’re tackling a full bathroom remodeling project or simply swapping out an old sliding door, understanding each stage will help you decide how much of the work you can reasonably handle yourself and where it makes more sense to call in a professional.
What Sets a Frameless Design Apart From a Framed Enclosure
A frameless shower door is built from thick tempered glass, usually 3/8 to 1/2 inch, that’s strong enough to stand on its own without a surrounding metal frame for support. The glass itself does the structural work, held in place by a small number of hinges, clips, or channels rather than the aluminum tracks and edging found on framed units.
A framed shower door, by contrast, relies on a metal perimeter to hold thinner glass panels in place. That frame adds rigidity and forgives minor measurement inconsistencies, but it also collects grime along the tracks and interrupts the visual line of the shower enclosure. Frameless designs use minimal hardware, which means better clarity and a more modern appearance, but it also means precision matters more at every step of installation. This clean glass look can also help create a stunning guest bathroom with a more open and contemporary feel.
Tools and Materials You’ll Need Before Starting

Before any glass goes near the shower opening, gather everything you’ll need so the job isn’t interrupted halfway through:
- Tape measure and a laser or torpedo level
- Cordless drill with glass-rated drill bits (if drilling into tile or stone)
- Masking tape to protect surfaces during layout
- Silicone sealant rated for wet environments
- Caulk gun and a smoothing tool
- Painter’s tape to guide clean sealant lines
- Suction cups or a glass-lifting tool for handling panels safely
- Hinges, clips, handle, and any mounting hardware specific to your door system
- A helper frameless glass panels are heavy and awkward for one person to manage alone
Measuring the Shower Opening Correctly
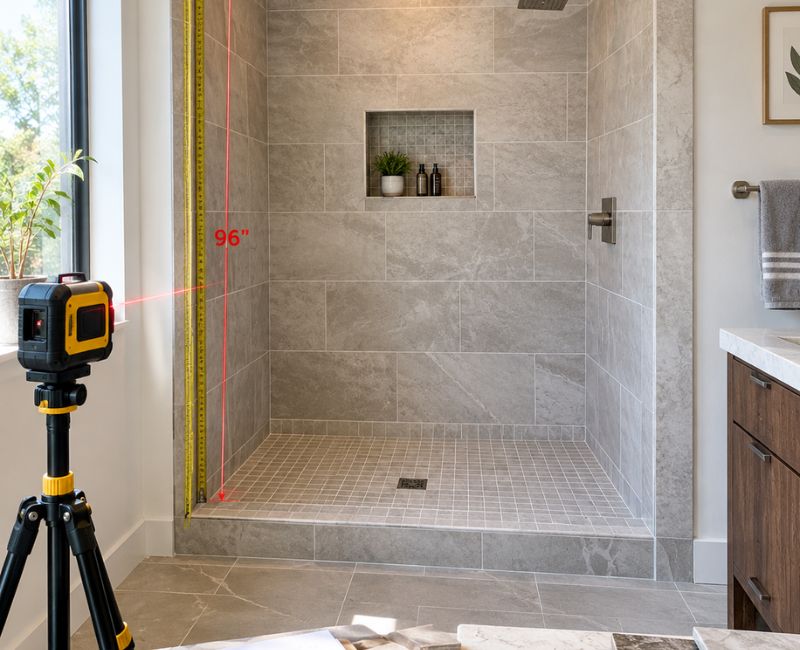
Accurate shower door measurements are the foundation of a good installation. Because a frameless shower door has so little hardware to compensate for gaps or overlaps, even small measurement errors become visible once the glass is hung.
Measure the width of the shower opening at the top, middle, and bottom, since walls and existing tile work are rarely perfectly straight. Do the same for height at both the left and right sides. Note the smallest width measurement and the smallest height measurement — these are the dimensions that should guide your door order or cutting specifications, since it’s easier to trim a slightly oversized custom panel than to work around one that’s too small.
Also check the diagonal measurements across the opening. If the two diagonals differ significantly, the opening isn’t square, and you’ll need to account for that when positioning hardware later.
Checking Walls, Floors, and the Existing Enclosure
Before finalizing any shower door measurements, inspect the condition of the surrounding structure. Run a level vertically along each wall to check for plumb, and lay it across the shower base or curb to confirm the floor is level. Minor deviations are common and can often be compensated for during installation, but significant slope or bowing may need to be corrected first, or factored into how hinges and clips are shimmed.
Inspect existing tile or stone for cracks, loose grout, or uneven surfaces where hardware will be mounted. Hinges and clips need a solid, flat anchor point mounting into compromised tile can lead to hardware pulling loose under the weight of the glass.
Choosing the Right Door Size and Hardware
Once you have accurate measurements, you can select a door size and the hardware that will support it. Frameless systems vary by manufacturer, so always defer to the specific installation instructions that come with your chosen door rather than assuming standard spacing or clearances apply universally.
Hardware options generally include:
- Hinges wall-mounted or glass-to-glass, depending on whether the door pairs with a fixed glass panel
- Handles knob-style, bar-style, or integrated pulls
- Clips and channels used on some fixed panels instead of a full hinge system
- U-channels or clamps for securing stationary glass at the base or side
Glass door hinges bear the full weight of the panel, so they need to be rated for the thickness and size of glass you’re installing. If you’re unsure which hardware matches your door, most manufacturers or glass suppliers can confirm compatibility before you begin.
Preparing the Installation Area
Clear the shower area completely and lay down protective covering on the floor to catch any dropped screws or hardware. Use painter’s tape to mark reference lines on the wall where hinges or clips will be mounted, based on your measurements. Double-check these marks against the manufacturer’s template before drilling anything, since a misplaced hole in tile or glass generally can’t be undone.
If you’re drilling into tile, use a glass or tile-rated bit, start at a low speed, and keep the bit cool with water to avoid cracking the surface.
Installing Hinges and Hardware
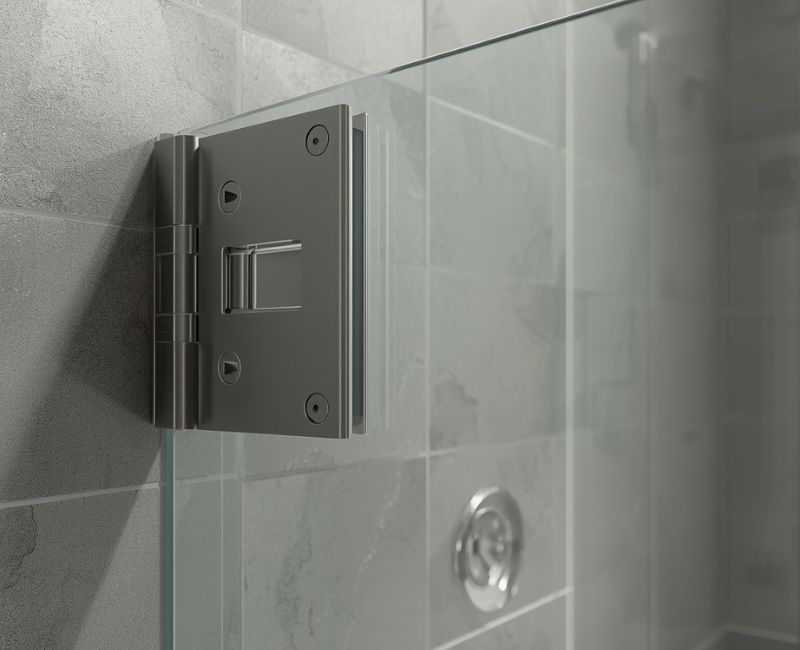
With reference marks in place, mount the wall-side hinges or clips first, following the spacing specified in your door’s instructions. Use a level at each step to confirm the hardware line stays straight, since even a slight tilt here will telegraph into the door’s final position.
| Installation Stage | What to Check | Why It Matters |
| Marking hinge locations | Level and matches manufacturer spacing | Uneven spacing causes the door to hang crooked |
| Drilling into tile or stone | Correct bit, slow speed, no cracking | Cracked tile weakens the mounting point |
| Mounting hardware | Screws tightened evenly, no wobble | Loose hardware shifts under glass weight |
| Test-fitting the glass panel | Even gap along the wall edge | Uneven gaps affect sealing and swing |
| Checking door swing | Clears floor and adjacent fixtures | Prevents rubbing, cracking, or binding |
| Final sealant application | Continuous bead, no gaps | Gaps allow water to escape the enclosure |
Positioning and Hanging the Glass Panel
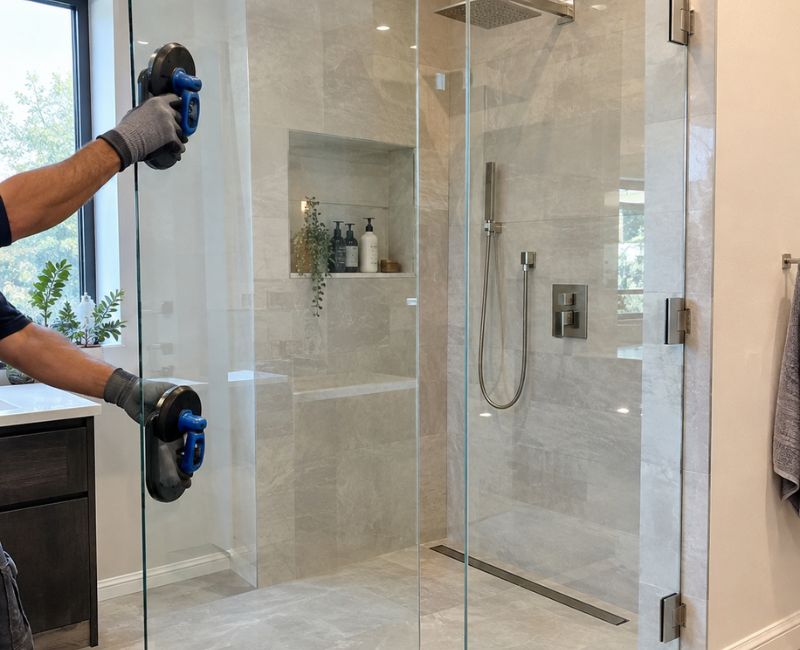
This is the step where an extra set of hands becomes necessary rather than optional. Tempered glass panels for a frameless shower door installation are heavy, often 40 to 80 pounds depending on size and thickness, and awkward to maneuver in the tight quarters of a bathroom.
Use suction cups or a proper glass-handling tool to lift the panel, keeping it vertical throughout the movement. Align the glass with the pre-mounted hinges and secure it according to the hardware’s specific attachment method, whether that’s a clamping mechanism, through-bolts, or a hinge pin. Don’t fully tighten anything until you’ve confirmed the door hangs correctly and swings without obstruction.
Aligning and Leveling the Door
Once the panel is hung, check shower door alignment from multiple angles. The door should hang plumb, with a consistent gap along its hinge side and a clean, even line where it meets any fixed panel or wall. Most hinge systems allow for minor shower door adjustment through small screws or pins that shift the panel slightly in one direction or another use these to fine-tune the fit rather than forcing the glass into position by hand.
Swing the door through its full range of motion to confirm it doesn’t drag on the floor, catch on the threshold, or bump into a fixed panel. Adjustments made now are far easier than trying to fix a poorly hung door after the sealant has cured.
Installing the Handle and Final Hardware
With the door aligned, attach the handle according to the hardware kit’s instructions. Most shower door handle designs mount through pre-drilled holes in the glass, so avoid over-tightening, which can stress tempered glass even though it’s designed to handle regular use. Confirm the handle doesn’t interfere with the door’s swing or contact the wall or fixed panel when opened fully.
Sealing the Enclosure Properly
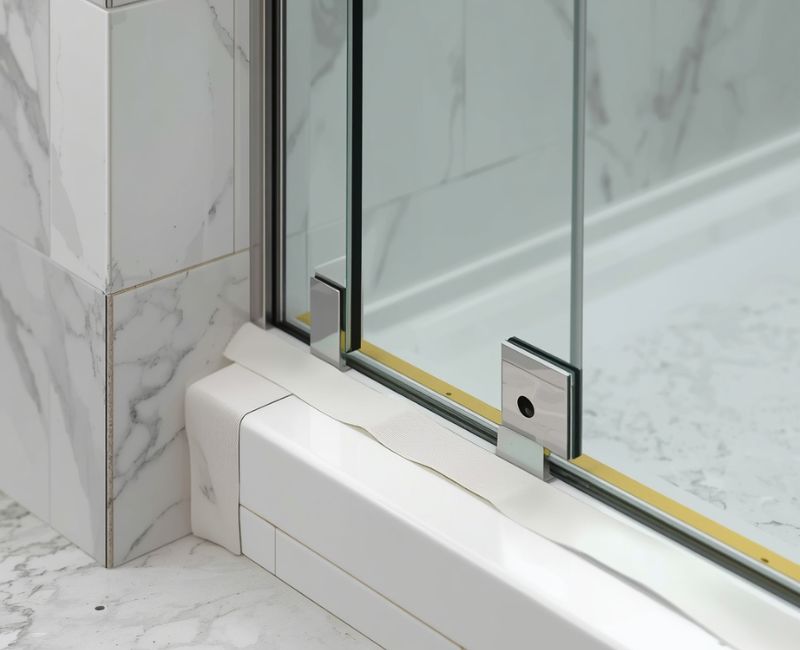
Sealing is what turns a well-aligned frameless shower door into a fully functional, waterproof shower door system. Apply painter’s tape along both sides of every seam that will receive sealant, which keeps the lines clean and makes cleanup easier.
Run a continuous, even bead of silicone sealant along the hinge-side seam, the bottom edge where the glass meets the shower base, and any point where the door meets a fixed panel. Smooth the bead with a caulking tool or a gloved finger for a consistent finish, then remove the tape before the silicone begins to set. Most sealants need at least 24 hours to cure fully before the shower is used, so resist the temptation to test the enclosure early.
Checking Clearance, Movement, and Watertightness
Before considering the job finished, confirm shower door clearance is consistent along the full length of the door, both at the hinge side and where it meets the wall or fixed panel. A gap that’s too wide invites water leakage; one that’s too tight causes rubbing and premature wear on the glass or hardware.
Run water in the shower and observe how it behaves along every seam. Watch specifically for water escaping at the bottom seal, around the hinge line, or at the junction with a fixed panel; these are the most common points where shower door leaks originate. If you notice moisture escaping anywhere, that seam likely needs an additional bead of sealant once the area is fully dry.
Frameless vs. Framed: A Side by Side Comparison
| Factor | Frameless Shower Door | Framed Shower Door |
| Appearance | Minimal hardware, open sightline | Visible metal edging around glass |
| Glass visibility | Thicker glass, fewer visual breaks | Thinner glass, segmented by frame |
| Hardware | Hinges, clips, handle only | Full perimeter track and frame |
| Cleaning | Fewer tracks and grooves to collect grime | Frame edges and tracks need regular cleaning |
| Installation complexity | Higher precision required | More forgiving of minor gaps |
| Maintenance | Occasional hardware and seal checks | Frame corrosion or track buildup possible over time |
| Cost considerations | Generally higher due to thicker glass and precision fabrication | Generally lower due to standardized parts |
| Waterproofing/sealing | Relies heavily on correct sealant application | Frame itself helps contain water |
| Best suited for | Modern remodels prioritizing a clean look | Budget-conscious projects or irregular openings |
Choosing a frameless shower door can also be a practical way to make a small bathroom feel more open by reducing visual barriers.
Common Mistakes to Avoid During Installation
Even careful DIYers run into the same handful of problems when installing a frameless shower door:
Incorrect measurements. Measuring only once, or only at one point along the opening, leads to a door that doesn’t fit properly. Always measure width and height at multiple points and use the smallest figures.
Ignoring wall plumb. Mounting hinges without first checking whether the wall is plumb results in a door that hangs crooked no matter how carefully the hardware itself is installed.
Poor hinge positioning. Hinges placed even slightly out of the manufacturer’s specified spacing put uneven stress on the glass and hardware over time.
Not supporting the glass adequately during installation. Attempting to hang a heavy panel without a second person or proper lifting tools risks dropping or chipping the glass.
Incorrect door clearance. Rushing the alignment step and skipping clearance checks leads to rubbing, binding, or gaps that let water escape.
Applying too much or too little sealant. A sparse bead leaves gaps that leak; an overly thick, sloppy bead looks unfinished and can trap moisture behind it.
Skipping alignment checks before sealing. Sealant makes future adjustments much harder, so confirm the door swings and closes properly before applying it.
Attempting the job without help. Frameless glass panels are simply too heavy and unwieldy for a solo installation in most cases.
Ignoring manufacturer instructions. Every frameless shower door system has its own hardware tolerances and mounting requirements generic online guidance should never override the instructions included with your specific door.
Professional Installation vs. Doing It Yourself
Whether to hire a professional installer for a frameless shower door installation or take it on yourself depends on a few honest factors: A successful home transformation also depends on knowing when a specialized installation requires professional help.
- Experience with glass and hardware. If you’ve never worked with tempered glass or precision-mounted hinges, the learning curve happens on your actual shower door.
- Tools on hand. Glass-rated drill bits, levels, and lifting equipment aren’t things most homeowners already own.
- Wall and floor condition. Out of plumb walls or an uneven shower base require adjustments that are harder to judge without experience.
- Door weight and size. Larger openings mean heavier glass panels, which raises both the difficulty and the risk of installation.
- Precision requirements. Frameless systems leave little margin for error compared to framed alternatives.
- Warranty considerations. Some manufacturers require professional installation to keep a warranty valid, so it’s worth checking before starting the project yourself.
DIY installation can work well for someone comfortable with basic home improvement tasks, a level, and a drill, especially on a straightforward, square opening. A more complex layout, an irregular wall, or a lack of confidence handling heavy glass are all good reasons to bring in professional shower door installation instead.
Handling Tempered Glass Safely
Tempered glass is significantly stronger than standard glass, but it’s still heavy, unforgiving of impact along its edges, and genuinely dangerous if dropped or mishandled. Always lift panels with a helper, keep the glass vertical rather than flat, and avoid setting it down on hard corners or unprotected surfaces. Wear gloves when handling edges, and never force a panel into position if it’s catching on hardware stop and check alignment instead of pushing through resistance.
Caring for Your Door After Installation
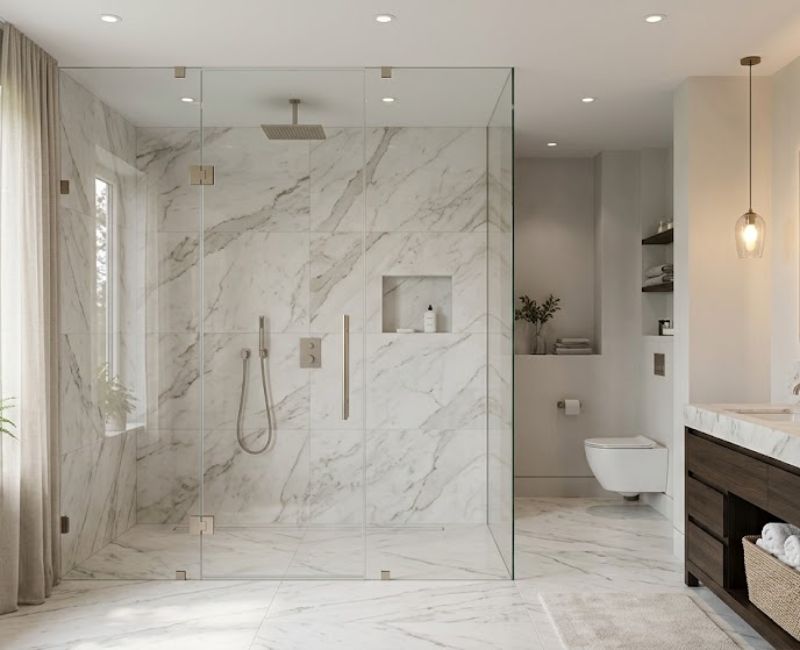
Routine shower door maintenance keeps a frameless shower door looking clear and functioning smoothly for years. Squeegee the glass after each use to prevent mineral buildup, and clean hardware periodically with a non-abrasive cleaner to avoid corrosion. Inspect the silicone seal every few months for cracking or gaps, since sealant naturally degrades over time and may need to be reapplied. Address any common shower door problems sticking hinges, minor leaks, or a handle that’s loosened as soon as they appear, rather than waiting for them to worsen.
Frequently Asked Questions
How Much Does It Cost to Install a Frameless Shower Door?
Shower door installation cost varies widely based on glass size, hardware quality, and whether you hire a professional or do it yourself. Larger openings, custom cuts, and higher-end hardware all push the price up, while a straightforward DIY installation on a standard opening will generally cost less than a fully custom, professionally installed enclosure.
Should I Install a Frameless Shower Door Myself or Hire a Professional?
It depends on your comfort with precision measuring, glass handling, and basic tools. A square, standard-sized opening is manageable for an experienced DIYer with help lifting the glass, while irregular walls, heavy panels, or warranty requirements often make professional installation the safer choice.
What Are the Main Problems With Frameless Shower Doors?
The most common issues include water leaking at seams due to worn or improperly applied sealant, hinges loosening over time, and doors that were never quite aligned correctly during installation. Most of these stem from either measurement errors or skipped alignment checks during the original installation.
How Long Does It Take to Install a Frameless Shower Door?
Installation time depends on experience and the complexity of the opening, but a straightforward job typically takes several hours from hardware mounting through final sealing, not counting the 24-hour cure time for silicone.
Can I Install a Frameless Shower Door on an Uneven Wall or Floor?
Minor irregularities can often be compensated for with shimming and hardware adjustments, but significant unevenness should be addressed before installation, since it affects both alignment and long-term sealing performance.
How Do I Know What Size Frameless Shower Door to Order?
Use the smallest width and height measurements taken from multiple points across the shower opening, and consult manufacturer guidelines for the specific clearances their hardware requires, since these details vary between systems.
Conclusions
Installing a frameless shower door rewards patience and precision more than it does speed. Accurate shower opening measurements, a level foundation, correctly positioned hinges, and a careful approach to sealing are what separate a door that performs well for years from one that leaks or hangs unevenly within months. Each stage builds on the one before it, which is why skipping alignment checks or rushing the sealant step tends to cause the most lasting problems.
If you’re comfortable working methodically, have a helper for the heavy lifting, and are willing to follow your specific hardware’s instructions closely, a DIY installation is entirely achievable. But if your shower opening is irregular, the glass is unusually large, or you’re not confident handling tempered glass safely, hiring a professional installer is a reasonable and often practical choice. Either way, getting the measurements and alignment right from the start is what makes the difference.

Welcome to Cozy Escape Hub! I am Muhammad Hassaan, an AI Powered SEO and content writer with a 2 years of experience.
I help websites rank higher, grow traffic , and look amazing. My goal is to make SEO and web design simple and effective for everyone. Let’s achieve more together!