

Halloween is the perfect time to make your home feel spooky, creative, and welcoming. However, decorating every room can become expensive when you buy everything from a store. The good news is that you can create a fantastic Halloween display with simple materials and a little imagination. 15 DIY Halloween Decorations for 2026 to Transform Your Home offers creative projects for different budgets, skill levels, and living spaces.
From floating ghosts to glowing lanterns, these projects can turn ordinary household items into memorable decorations. You can decorate your front porch, living room, windows, garden, or apartment without spending a fortune. These Easy DIY Halloween decorations also let you choose your favorite colors and designs. Whether you prefer a classic haunted-house look or a modern autumn display, you will find plenty of inspiration here.
15 DIY Halloween Decorations at a Glance
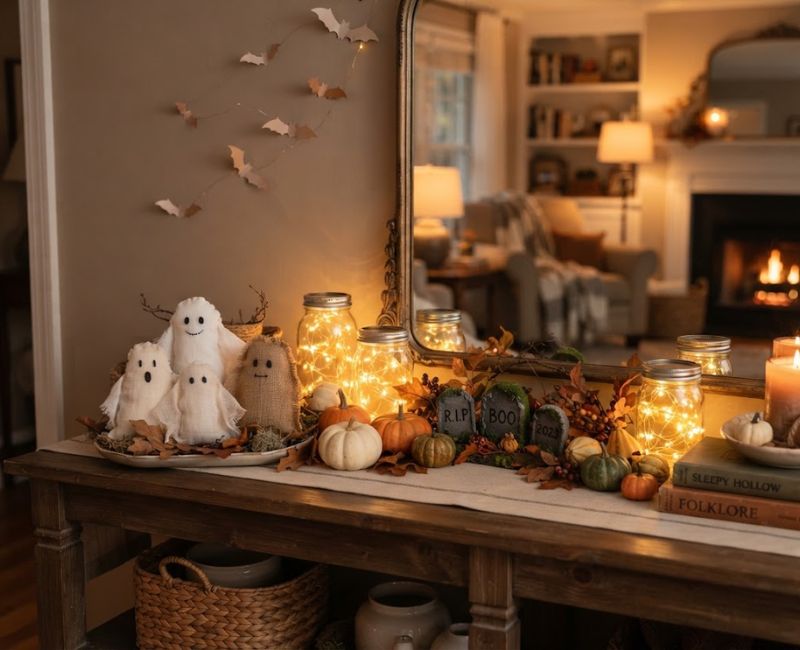
Choosing the right project becomes easier when you compare the cost, time, and difficulty before starting. Some Halloween decoration projects require only paper, fabric, or recycled jars. Others need more preparation and stronger materials for outdoor use. Start with a project that suits your available time and experience.
The following table provides estimated costs and completion times for common Halloween decorating ideas. Actual expenses depend on the supplies you already own, your location, and the size of each decoration.
| Decoration Idea | Estimated Cost | Difficulty Level | Time Required | Best Place to Display |
| Spooky Ghost Decorations | 5–15 | Easy | 30–60 minutes | Porch or yard |
| Budget Halloween Porch Display | 10–30 | Easy | 1–2 hours | Front porch |
| Paper and Cardboard Decorations | 3–12 | Easy | 30–60 minutes | Walls or windows |
| No-Carve Painted Pumpkins | 5–20 | Easy | 30–90 minutes | Entryway or table |
| DIY Halloween Tombstones | 10–30 | Moderate | 2–4 hours | Lawn or garden |
| Glowing Jar Lanterns | 5–15 | Easy | 30–60 minutes | Shelves or porch |
| Creepy Window Decorations | 3–12 | Easy | 30–60 minutes | Windows |
| Giant DIY Spiderweb | 8–25 | Moderate | 1–2 hours | Porch or yard |
| Recycled Household Decorations | 0–15 | Easy | 30–90 minutes | Indoor displays |
| Light-Up Halloween Decorations | 8–25 | Easy | 30–90 minutes | Porch or living room |
| Small-Space Halloween Decor | 5–20 | Easy | 30–60 minutes | Apartment |
| DIY Halloween Lawn Display | 15–40 | Moderate | 2–4 hours | Front yard |
| Renter-Friendly Decorations | 5–20 | Easy | 30–60 minutes | Doors or entryway |
| Spooky Halloween Centerpiece | 5–20 | Easy | 30–60 minutes | Dining table |
| Coordinated Halloween Display | 15–50 | Easy to Moderate | 2–4 hours | Whole home |
1. Make Spooky Ghost Decorations Using Old Sheets
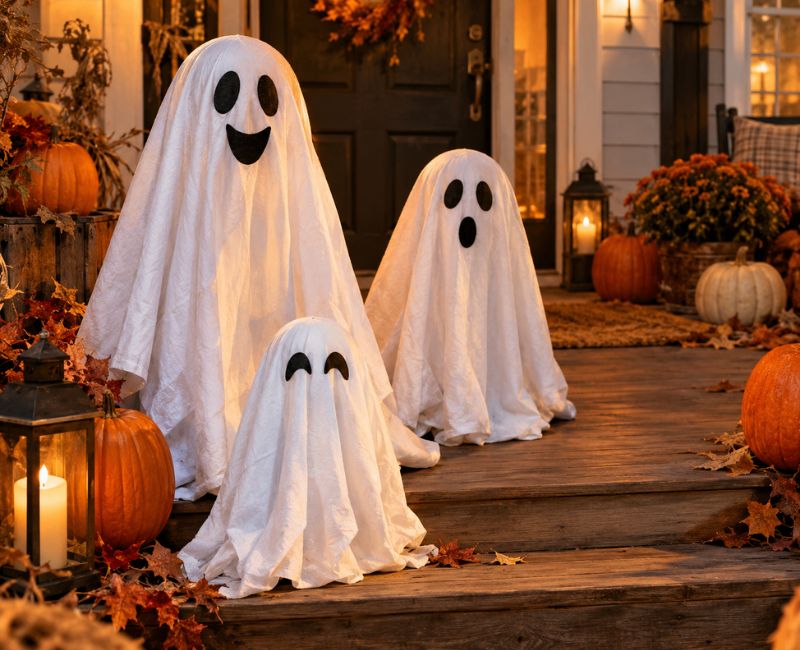
Old white sheets can become charming ghosts with very little effort. These DIY ghost decorations work well on porches, in gardens, and around indoor doorways. Their flowing fabric creates movement, especially when a gentle breeze passes through an outdoor display. You can make each ghost look friendly or frightening by changing its facial expression.
Materials You Need to Make DIY Ghosts
Start with an old white sheet, a lightweight support, some string, and black felt. A foam ball can help create a rounded head. You can also use a lightweight, stable frame to shape the fabric. These simple Halloween decoration materials are often available at home, which keeps the project affordable.
Step-by-Step Instructions for Creating Ghost Decorations
First, drape the white fabric over your support and arrange the bottom into loose folds. Add two dark eyes and a mouth using suitable craft materials. Secure the fabric so it cannot slip easily. If you want a floating effect, hang the ghost from a secure point. These Homemade Halloween decorations are easy to customize with different sizes and expressions.
Where to Display Homemade Ghosts Indoors and Outdoors
Place small ghosts near entryways, bookshelves, or windows. Larger versions look effective beneath a covered porch or in a garden. However, outdoor fabric can become wet and heavy during rain. Secure each decoration properly and bring it indoors during severe weather. Keep hanging ghosts away from electrical wires, doorways, and walking paths.
2. Create a Halloween Porch Display on a Budget

Your front porch creates the first impression of your Halloween decorations. For more inspiration on creating a welcoming entrance throughout the year, explore these entryway decor ideas to impress guests. Fortunately, attractive Halloween porch decorating ideas do not require expensive props. A few pumpkins, handmade signs, fabric accents, and carefully placed lights can transform a plain entrance. Reusing furniture and containers also helps you create Budget-friendly Halloween decor without unnecessary purchases.
Decorate Your Front Door With a DIY Mummy Design
Turn your front door into a giant mummy using lightweight white fabric strips or suitable removable materials. Arrange the strips in overlapping layers and add two large eyes near the upper section. Keep the handle, lock, and peephole accessible. Test any adhesive on a discreet area first to avoid damaging the finish.
Add Pumpkins, Garlands, and Homemade Signs
Place pumpkins beside the entrance and hang a seasonal garland where it will not block the doorway. Add a handmade sign with a short Halloween greeting. Different heights make the arrangement more interesting. For example, place larger pumpkins on the ground and smaller decorations on a stable bench. Choose outdoor-suitable materials if the porch receives rain.
How to Make Your Halloween Porch Look More Expensive
A coordinated color scheme can make inexpensive decorations look polished. Combine black, white, and orange or choose a more muted palette with cream and deep burgundy. Repeat these colors across your wreath, pumpkins, and signs. Add warm LED lights for depth. A simple arrangement with a clear focal point often looks better than a porch crowded with unrelated objects.
3. Make DIY Halloween Decorations With Paper and Cardboard

Paper and cardboard offer endless possibilities for affordable Halloween crafts. They can become bats, haunted houses, witches, and other spooky shapes. These Cardboard Halloween decorations are especially useful when you want a dramatic display without buying large props. They also suit families looking for Simple Halloween crafts for beginners.
Create Flying Bats From Black Cardstock
Draw several bat shapes on black cardstock and cut them out carefully. Fold the wings slightly to create a three-dimensional effect. Arrange the bats in a curved pattern across a wall or window. Using different sizes makes the display appear more natural. These Halloween paper crafts work especially well against pale walls.
Turn Cardboard Into Spooky Halloween Silhouettes
Use clean cardboard to create haunted houses, black cats, or crooked gravestones. Sketch each shape before cutting it out. Paint the finished pieces with suitable craft paint and let them dry completely. Place larger silhouettes near windows or inside a covered porch. Keep ordinary cardboard away from prolonged moisture because it can soften and lose its shape.
How to Display Paper Decorations Without Damaging Walls
Lightweight decorations can often be attached with removable products designed for the surface. Always check the manufacturer’s instructions and test a small area first. Window silhouettes can also be positioned using suitable static-cling materials. Avoid strong adhesives on delicate paint or wallpaper. With careful placement, you can create an impressive display without leaving unnecessary marks.
4. Transform Pumpkins With Creative No-Carve Designs

Pumpkins are classic Halloween decorations, but carving is not the only option. DIY pumpkin decorating ideas include painting, wrapping, drawing, and adding decorative details. These methods offer more freedom to experiment with patterns and colors. They also avoid the cutting work associated with traditional jack-o’-lanterns.
Paint Pumpkins in Black, White, and Halloween Colors
Begin with a clean, dry pumpkin and select paint suitable for its surface. Black creates a dramatic appearance, while white gives the pumpkin a softer, ghostly look. Orange, burgundy, and metallic accents can create a coordinated arrangement. Apply thin coats and allow each layer to dry according to the product instructions.
Create Ghost and Spider Designs on Pumpkins
Paint a simple white ghost on a dark pumpkin or add black spider shapes to a pale surface. Templates help beginners create clean outlines. You can also draw expressive faces using suitable markers. Combine pumpkins of different sizes for a more interesting display. These Painted pumpkins can complement a porch arrangement or become a centerpiece indoors.
How to Make Painted Pumpkins Last Longer
Keep painted pumpkins in a cool, dry location away from excessive heat. Handle them gently to prevent scratches and dents. Natural pumpkins will eventually soften or decay, even when you leave their skin intact. Artificial pumpkins offer a longer-lasting option for decorations you want to reuse. Store them carefully after the season ends.
5. Build Scary DIY Halloween Tombstones for Your Yard

A miniature graveyard can turn an ordinary lawn into a spooky Halloween scene. Homemade Halloween tombstones are useful for creating depth and establishing a clear theme. You can arrange them beside a walkway or combine them with ghosts and silhouettes. Choose materials according to the weather and the size of your planned display.
Choose Affordable Materials for Homemade Tombstones
Craft foam and suitable corrugated plastic can work better outdoors than ordinary cardboard. Cardboard remains a budget option for covered areas or temporary indoor displays. Compare each material’s weight, durability, and ease of cutting before starting. Wear suitable protective equipment when cutting materials and follow the instructions for any paint or adhesive.
Cut, Paint, and Decorate Your DIY Graveyard Props
Sketch a tombstone shape and cut the material carefully. Apply gray paint, then add darker shading around the edges. Small cracks and uneven lettering create an aged appearance. You can also use fictional names for a playful haunted graveyard. Arrange the finished props at different heights to give your Halloween graveyard decorations more visual depth.
How to Secure Outdoor Tombstones Against Wind
Lightweight tombstones can fall when wind catches their broad surfaces. Use suitable stakes or supports that match the material and ground conditions. Keep every support away from walking routes. Inspect the display after windy weather and remove unstable pieces when necessary. Ordinary cardboard tombstones should remain in dry, sheltered locations.
6. Make Glowing Halloween Lanterns From Recycled Jars
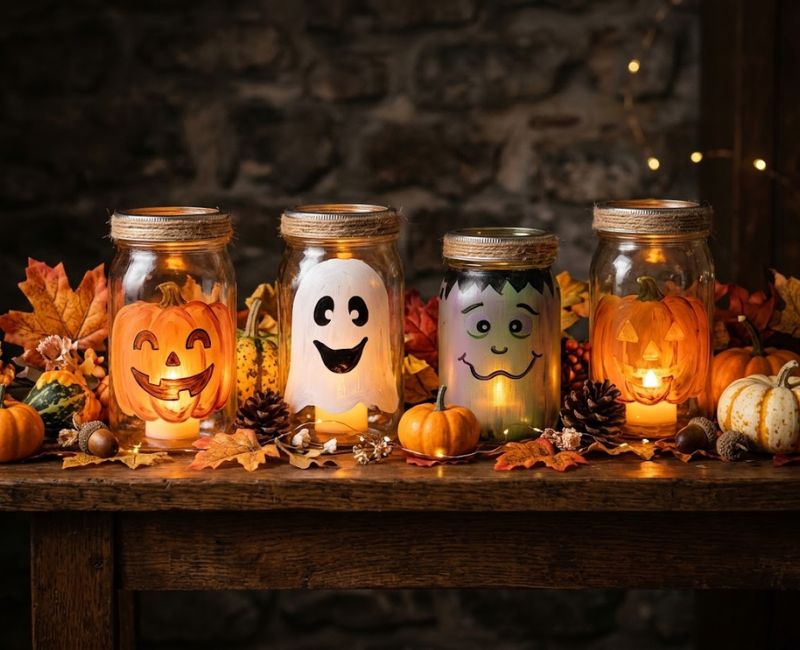
Empty jars can become atmospheric lanterns with paint, simple designs, and small lights. These DIY Halloween lanterns suit shelves, dining tables, and covered porches. They are also a practical way to reuse containers instead of purchasing new decorations. Choose a ghost, pumpkin, or monster theme to match your other projects.
Gather Glass Jars, Paint, and Battery-Powered Lights
Clean and dry suitable jars before decorating them. Gather compatible craft paint, brushes, and small battery-operated LED lights. Translucent paint allows more light through than an opaque coating. If you have young children or pets, consider lightweight plastic containers instead of glass. Choose containers with stable bases to reduce the chance of tipping.
Create Spooky Faces and Glowing Effects
Paint a ghost face or a jack-o’-lantern expression on the outside of the jar. Let the paint dry fully before adding the light. Place a suitable LED inside and test the effect in a dim room. If the light looks too faint, adjust the paint coverage or use a compatible brighter light.
Where to Place DIY Halloween Lanterns for the Best Effect
Arrange lanterns on stable shelves, side tables, or covered porch surfaces. Grouping several jars creates a stronger visual effect than scattering them randomly. Keep glass containers away from table edges and areas where children play. For outdoor use, check that the lights and other components are suitable for the expected conditions.
7. Create Creepy Halloween Window Decorations
Windows provide an excellent space for DIY Halloween window decorations because silhouettes can look striking from both inside and outside. You can create a haunted scene with bats, witches, cats, or mysterious shadows. These designs work well when floor space is limited. They also add visual interest without requiring large props.
Make Black Bat and Witch Silhouettes
Cut bat and witch shapes from black cardstock or another suitable lightweight material. Place the shapes against a lighter window background to improve contrast. Arrange smaller bats around a larger central figure. This simple composition can suggest movement across the glass. Make sure the decorations do not obstruct important views or create visibility problems.
Create a Haunted Window Using Removable Decorations
Combine silhouettes with paper ghosts and other lightweight scene elements. Use window-safe materials or removable products approved for the surface. Test attachment methods before decorating the entire window. Renters should avoid permanent fasteners and adhesives that may damage coatings. A simple haunted scene can look impressive without complicated installation.
How to Make Window Decorations Visible at Night
Lighting affects how clearly people can see window decorations after dark. Position suitable indoor lights so the silhouettes stand out against the background. However, bright reflections may reduce visibility from outside. Test the display from the street or walkway before Halloween. Keep lights and cords away from curtains and other flammable materials.
8. Build a Giant DIY Spiderweb for Your Porch or Yard

An oversized spiderweb can become the main attraction of an outdoor display. String or rope creates a dramatic pattern without requiring complicated equipment. This project works well across a covered porch or against a suitable freestanding frame. The finished web can also complement other DIY outdoor Halloween decorations.
Choose String, Rope, or Other Suitable Materials
Select a material that suits the size and location of your web. Lightweight yarn may work for a small indoor display, while stronger cord may suit a larger outdoor structure. Check the material’s strength and weather resistance. Avoid attachment points that could damage siding, railings, or tree branches.
Build and Shape an Oversized Spiderweb
Create a secure framework before adding the cross-lines. Connect the main strands and work outward until the web reaches the desired size. Adjust the spacing to make the pattern recognizable. A smaller web can fit a balcony or entryway. A larger version can frame a porch without covering the entire entrance.
Add DIY Spiders for a More Realistic Look
Create spiders from suitable craft materials and vary their sizes. Position the largest spider near the center or along one edge of the web. Smaller spiders can fill empty spaces. Keep the finished decoration clear of pedestrian routes, doorways, and emergency exits. Check its supports regularly when displaying it outdoors.
9. Turn Old Household Items Into Halloween Decorations
Unused household items can become creative Halloween props with very little spending. Empty bottles, fabric scraps, jars, and cardboard offer plenty of possibilities. These Recycled Halloween decorations also help reduce waste. With consistent colors and careful arrangement, everyday objects can become convincing Homemade spooky decorations.
Transform Empty Bottles Into Spooky Potion Props
Wash and dry empty bottles before using them as decorative props. Add fictional potion labels, dark paint, or paper accents. Arrange the bottles on a shelf or table with other Halloween objects. Clearly distinguish decorative containers from real drinks or food. Never use containers that previously held hazardous chemicals for decorative purposes.
Repurpose Old Fabric, Jars, and Cardboard
Old fabric can become ghostly draping or a table accent. Clean jars can hold LED lights, while cardboard can become a haunted house. Inspect every item for sharp edges, dirt, or damage. Choose materials that suit the display location. Fabric and paper generally work better indoors or in protected areas.
Make Recycled Decorations Look Stylish and Realistic
Choose a limited color palette and repeat it across your decorations. Black, gray, white, and orange can make different objects look like part of one collection. Add contrasting textures to create depth. Avoid filling every available surface. A few carefully arranged objects often create a more convincing scene than a crowded display.
10. Create DIY Halloween Decorations That Light Up
Lighting can change an ordinary room into a mysterious Halloween setting. DIY Halloween lighting ideas include glowing ghosts, illuminated jars, and decorative string lights. These projects can highlight other decorations after sunset. However, the best results come from choosing suitable lights and placing them carefully.
Make Glowing Ghosts With Battery-Powered Lights
Shape lightweight white fabric around a suitable support and position a compatible battery-powered LED inside or nearby. Adjust the fabric to create a soft glow. Keep batteries accessible for inspection and replacement. Never place hot bulbs against fabric. Test the finished decoration before displaying it near children or pets.
Use LED String Lights to Create a Spooky Atmosphere
Wrap suitable LED string lights around a decorative frame or arrange them along a covered porch railing. Warm white lights create a softer effect, while colored lights can make a display look more dramatic. Keep cords away from moving doors and walkways. Use products specifically rated for outdoor conditions when needed.
Choose Safe Lighting for Indoor and Outdoor Displays
Read product labels and follow the manufacturer’s installation instructions. Outdoor displays may require weather-rated lights, connectors, and power supplies. Keep electrical components away from standing water. Battery-operated products can reduce the need for extension cords. Check the display regularly and remove damaged lights from use.
11. Make Easy DIY Halloween Decorations for Small Spaces
Small homes and apartments can still have a memorable Halloween display. The key is to use vertical space and select decorations with a clear purpose. Halloween decorations for small spaces can include miniature pumpkins, paper bats, and compact lanterns. These projects suit Small apartment decorating without taking over the room.
Decorate Shelves and Tables With Mini Halloween Props
Arrange mini pumpkins, small ghosts, and decorative jars on a shelf or side table. Group objects by color and height to create a balanced arrangement. If you also want to make the most of a compact bedroom, check out these small bedroom gaming room ideas for practical ways to organize furniture and use limited space creatively. Leave enough room for everyday items. A small display with a clear focal point can look more attractive than a crowded collection of props.
Create a Spooky Display for a Small Entryway
Decorate a narrow console or entry shelf with a small wreath and a few seasonal objects. Removable wall accents can add height without using floor space. Keep the doorway clear and avoid blocking switches or handles. Choose decorations that match the existing furniture to create a coordinated appearance.
Make Decorations That Are Easy to Store After Halloween
Choose collapsible fabric decorations and lightweight props that fit into ordinary storage containers. Separate fragile objects from paper and fabric. Label each container so you can find everything next year. Proper Halloween decoration storage also helps prevent crushing, moisture damage, and unnecessary replacement costs.
12. Build a DIY Halloween Lawn Display With Homemade Props
A lawn display can make your home stand out throughout the Halloween season. You do not need expensive animatronics or oversized store-bought props to create a memorable scene. A few tombstones, ghosts, and silhouettes can form effective DIY Halloween yard decorations. Plan the layout before installing anything in the ground.
Create a Small Outdoor Graveyard Scene
Arrange tombstones at different heights and leave space between each prop. Use suitable ground supports to keep lightweight pieces stable. A few scattered artificial leaves can add seasonal detail. Avoid blocking paths or placing hard objects where visitors might trip. A compact graveyard can look convincing when its elements work together.
Add Ghosts and Spooky Silhouettes to Your Yard
Combine hanging ghosts with ground-level silhouettes to create different visual layers. Use one main focal point, such as a large ghost or a small graveyard. Repeat the same colors across the scene. These Outdoor Halloween display ideas can work in narrow front yards as well as larger lawns.
Keep Lawn Decorations Stable in Wind and Rain
Outdoor decorations need regular checks because weather can change quickly. Secure each prop according to its size and construction. Protect cardboard and untreated fabric from moisture. Remove unstable decorations when strong winds approach. Before placing stakes in the ground, check for underground utility lines and follow local safety guidance.
13. Make Renter-Friendly Halloween Decorations Without Drilling
Renters can decorate their homes without making permanent changes. DIY Halloween decorations for renters include tabletop displays, removable window designs, and freestanding props. These options work well in apartments and rented houses. Always check your lease and test attachment methods before applying them to painted or delicate surfaces.
Decorate Doors With Removable Halloween Designs
Use lightweight door decorations and suitable removable materials to create a seasonal focal point. Add a paper ghost, a small wreath, or a simple mummy design. Keep handles, locks, and peepholes clear. Check that decorations do not interfere with door movement or emergency access.
Use Freestanding Decorations Instead of Wall Fixtures
Place lanterns on stable furniture or arrange decorations on a freestanding shelf. Small pumpkins and tabletop ghosts can add personality without requiring nails. Keep heavy objects secure and away from narrow passages. These arrangements are easy to move when you need to clean or rearrange your living space.
Remove Halloween Decorations Without Leaving Marks
Follow the removal instructions supplied with any adhesive product. Pull decorations away slowly rather than tearing them off. Clean the surface with a product suitable for its finish. If you are unsure about an adhesive, test it in a discreet location before using it across a large area.
14. Create a Spooky Halloween Centerpiece for Your Table
A seasonal centerpiece can bring Halloween style to a dining room without requiring a complete room makeover. DIY Halloween centerpiece projects work well with mini pumpkins, jars, decorative branches, and trays. They can also become a focal point for a Halloween dinner. Keep the arrangement balanced and leave enough room for plates and serving dishes.
Combine Mini Pumpkins, Jars, and Decorative Branches
Start with a stable tray or another suitable base. Arrange mini pumpkins around a jar or decorative branch to create different heights. Artificial branches can be reused, while clean natural materials can provide a rustic appearance. Make sure the centerpiece does not obstruct conversation across the table.
Choose Colors That Match Your Halloween Theme
Orange and black create a traditional Halloween look. White, burgundy, and metallic accents offer a softer alternative. Repeat colors already used in the room to make the centerpiece feel connected to the surrounding decor. A consistent palette can make inexpensive materials look more carefully selected.
Make an Affordable Centerpiece With Everyday Items
Reuse bowls, jars, trays, and fabric scraps instead of purchasing a new set of decorations. Add a few seasonal accents to complete the design. Keep the centerpiece away from hot cookware and open flames. Battery-powered lights can provide a gentle glow without introducing an open flame.
15. Design a Cohesive Halloween Display for Your Home
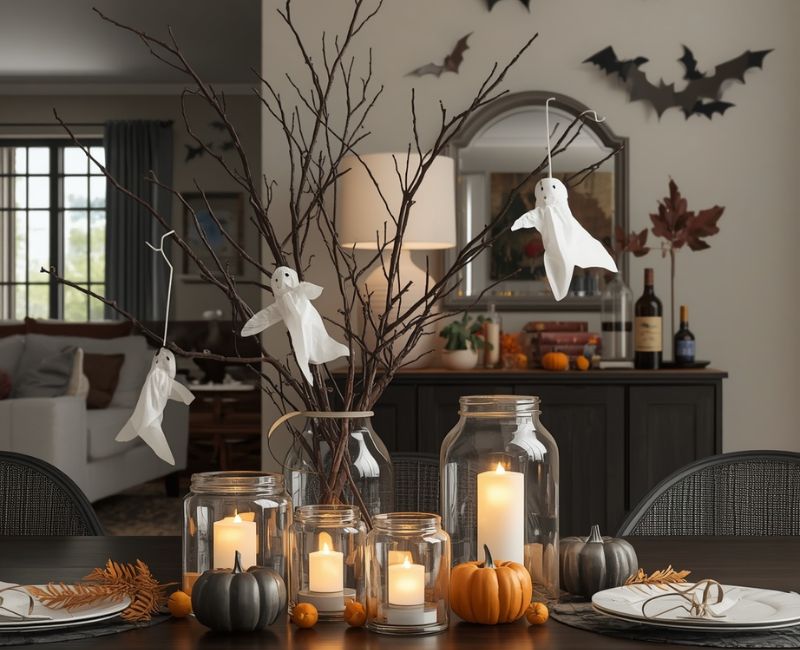
The most memorable displays usually follow a clear theme. Instead of decorating every room differently, connect your favorite projects through color, lighting, and repeated shapes. If you enjoy experimenting with bold colors and playful decorations, explore the psychology of dopamine decor to discover how colorful interiors can create a more cheerful atmosphere.
These Creative Halloween decorating ideas can make separate decorations feel like parts of one design. A little planning also helps prevent unnecessary purchases.
Choose a Halloween Theme Before Making Decorations
Consider a classic haunted house, a rustic autumn display, or a modern black-and-white theme. Think about your home’s existing colors and the amount of space available. A family-friendly display may use friendly ghosts and painted pumpkins, while a scarier theme may include tombstones and dramatic shadows. Choose a style you can maintain throughout the home.
Coordinate Colors, Lighting, and DIY Props
Repeat a few colors across the porch, living room, and entryway. Combine similar materials to create a consistent look. For example, black paper bats can complement black lantern accents and painted pumpkins. Use lighting to highlight key objects rather than illuminating every corner equally.
Arrange Indoor and Outdoor Decorations for a Consistent Look
Connect your porch decorations with a few matching indoor accents. A repeated pumpkin color or ghost design can create a natural transition between spaces. Keep outdoor props weather-appropriate and indoor arrangements practical. Coordinated Indoor and outdoor displays can make your home feel festive without requiring identical decorations in every area.
How to Make DIY Halloween Decorations Last Longer
Good materials and careful maintenance can help decorations survive beyond a single Halloween. Choose supplies according to where each object will be displayed. Paper crafts work well indoors, while exposed outdoor displays need more durable materials. Thoughtful preparation can also reduce replacement costs and simplify next year’s decorating.
Protect Outdoor Decorations From Rain and Wind
Use weather-suitable materials and secure decorations according to their size. Keep untreated cardboard and delicate fabric under shelter. Inspect outdoor props after storms or strong winds. When severe weather approaches, bring lightweight items inside instead of risking damage or injury.
Choose Durable Materials for Reusable Halloween Props
Artificial pumpkins, suitable craft foam, and reusable fabric can serve you for several seasons. Compare the initial price with the likely number of times you will use each item. Follow paint and coating instructions to maintain the finish. Store reusable pieces where they will not become crushed or damp.
Clean and Store Decorations Properly After Halloween
Remove dirt and dust before packing decorations away. Let washable items dry completely when appropriate. Wrap fragile pieces separately and place small accessories in labeled containers. Store everything in a dry location away from excessive heat. These habits make Reusable Halloween decorations easier to find and prepare next year.
Essential Safety Tips for Homemade Halloween Decorations
Creative displays should remain safe for everyone who visits your home. Check the stability of props and keep entrances clear. Follow product instructions when using paint, adhesives, lighting, or cutting tools. Good Halloween decoration safety starts before installation and continues throughout the season.
Use Battery-Powered Candles Near Paper and Fabric
Battery-operated candles are a practical alternative to open flames around paper ghosts, fabric drapes, and cardboard props. Check their condition before use and follow the manufacturer’s guidance. Keep real flames away from decorations and never leave them unattended. Replace damaged battery products rather than continuing to use them.
Keep Walkways Clear of Decorations and Electrical Cords
Place decorations away from steps, doorways, and narrow paths. Secure cables so visitors cannot trip over them. Keep lights and power connections suitable for their location. Check the route to every exit before Halloween night. Clear pathways are especially important when children visit for trick-or-treating.
Secure Tall Props and Outdoor Decorations Properly
Large ghosts, tombstones, and freestanding props can become unstable in wind. Use appropriate supports and inspect them regularly. Avoid sharp exposed edges and unstable bases. Remove damaged decorations promptly. When using stakes or other ground supports, check for underground utilities before installation.
Frequently Asked Questions About DIY Halloween Decorations
What Are the Easiest DIY Halloween Decorations to Make?
Paper bats, fabric ghosts, painted pumpkins, and glowing jar lanterns are simple choices. Most require basic supplies and little crafting experience. Start with one small project and expand your display as time permits. Choose materials you already have to keep the initial cost low.
How Can I Make Halloween Decorations on a Small Budget?
Reuse cardboard, old sheets, jars, and fabric scraps before purchasing new supplies. Choose a simple color scheme and concentrate on a few focal decorations. Compare material prices and avoid buying tools you will use only once. Small, well-arranged projects can still create an impressive Halloween display.
What Household Items Can I Use for Halloween Decorations?
Old sheets can become ghosts, cardboard can become silhouettes, and clean jars can become lanterns. Empty decorative bottles can also work as potion props. Inspect all reused materials before starting. Avoid containers that hold hazardous substances and keep fragile items away from children and pets.
How Can I Decorate My Home for Halloween Without Drilling?
Choose freestanding decorations, tabletop props, removable window designs, and suitable adhesive products. Check the surface compatibility before attaching anything. Renters should also review their lease when necessary. These approaches allow you to create a seasonal display without permanent holes or fixtures.
How Long Do Homemade Halloween Decorations Last?
Their lifespan depends on materials, construction, weather, and storage. Paper decorations can last for several seasons when kept dry and handled carefully. Artificial pumpkins and durable props may last longer. Natural pumpkins usually deteriorate over time, especially in warm or damp conditions.
When Should I Start Making Halloween Decorations?
Start planning early enough to gather materials and complete larger projects without rushing. Simple paper crafts may take less than an hour, while lawn displays can require several hours. Begin with your most complicated projects, then add smaller decorations as Halloween approaches.
final thoughts
Creating a memorable Halloween display does not require a large budget or professional crafting skills. With fabric ghosts, painted pumpkins, homemade tombstones, and glowing lanterns, you can transform ordinary spaces into something special. These Spooky Halloween decorations for home can reflect your personality while making your porch, garden, or living room feel festive.
Start with projects that match your available space, time, and materials. Reuse household items whenever possible and choose durable supplies for decorations you want to keep. Most importantly, focus on a consistent theme rather than buying everything you see. A few thoughtful details can make your home feel wonderfully spooky throughout the Halloween season.

Welcome to Cozy Escape Hub! I am Muhammad Hassaan, an AI Powered SEO and content writer with a 2 years of experience.
I help websites rank higher, grow traffic , and look amazing. My goal is to make SEO and web design simple and effective for everyone. Let’s achieve more together!